Disclaimer: This post may contain affiliate links. As an Amazon Associate, we earn from qualifying purchases.
If you own an inkjet printer, you know how frustrating it can be when your prints come out smudged or streaked. That’s where “The Ultimate Guide to Cleaning Your Inkjet Printer” comes in. This comprehensive guide provides step-by-step instructions on keeping your printer in tip-top shape, ensuring crisp and clear prints every time. From removing clogged ink nozzles to cleaning the paper feed rollers, this guide has all the information you need to maintain your printer’s performance and prolong its lifespan. Say goodbye to print quality issues and hello to hassle-free printing with this ultimate cleaning guide.
The Ultimate Guide to Cleaning Your Inkjet Printer
Is your inkjet printer acting up? Are your prints coming out streaky or blurry? It might be time to give your printer a good cleaning. Regular maintenance and cleaning are essential to keep your printer running smoothly and producing high-quality prints. In this comprehensive guide, we will take you through the step-by-step process of cleaning your inkjet printer to ensure optimal performance and longevity.
1. Preparing for Cleaning
Before diving into the cleaning process, it’s important to gather the necessary supplies. You will need:
- Soft lint-free cloths
- Isopropyl alcohol or distilled water
- Compressed air canister
- Cotton swabs
- Gloves (optional, for safety precautions)
In addition to the supplies, it’s essential to take some safety precautions. Make sure to unplug the printer from the power source before starting the cleaning process. It’s also a good idea to wear gloves to protect your hands and prevent any potential damage to the printer.
2. Cleaning the Exterior of the Printer
Start by turning off the printer and unplugging it from the power source. This prevents any potential accidents or electric shocks while cleaning. Once the printer is safely disconnected, use a soft cloth lightly dampened with distilled water or isopropyl alcohol to wipe down the exterior surfaces of the printer. Be gentle and avoid using excessive force to prevent any damage.
Next, pay attention to the control panel and buttons. Use a cotton swab lightly dampened with isopropyl alcohol to clean the control panel and buttons, removing any dirt or grime that may have accumulated. Take care not to press too hard and avoid using excessive liquid.
3. Cleaning the Paper Path
Over time, dust and debris can accumulate in the paper input tray, leading to paper jams and poor print quality. To remove dust and debris, gently pull out the paper input tray and wipe it clean with a soft cloth. This ensures smooth paper feeding and helps maintain print quality.
If you encounter a paper jam, refer to your printer’s user manual for specific instructions on how to remove the jammed paper. Be careful while removing the paper to avoid tearing it and causing further complications.
The rollers in the paper path can also accumulate dirt and debris, leading to feeding issues and print defects. Use a lint-free cloth lightly dampened with distilled water to clean the rollers. Gently rotate the rollers with your fingers as you clean to ensure a thorough cleaning.

4. Cleaning the Print Head
The print head is a crucial component of your inkjet printer that can become clogged with dried ink over time, resulting in poor print quality. Most printers have a self-cleaning utility that can be accessed through the printer settings. Run the self-cleaning utility to clear any blockages in the print head.
If the self-cleaning utility doesn’t resolve the issue, manual cleaning of the print head nozzle may be necessary. Remove the ink cartridges and gently dab a lint-free cloth moistened with distilled water against the nozzles to remove any dried ink or debris. Avoid using excessive force and be gentle to prevent any damage.
5. Cleaning the Ink Cartridges
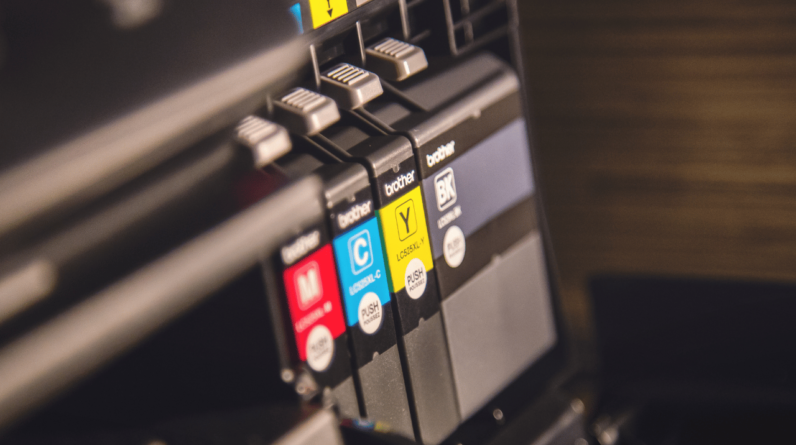
Proper maintenance of ink cartridges is crucial for optimal print quality. Start by removing the ink cartridges from the printer. Inspect each cartridge for any signs of leakage or damage. If any cartridges appear to be damaged, it’s best to replace them before proceeding with cleaning.
To clean the cartridge nozzles, dampen a lint-free cloth or a cotton swab with distilled water or isopropyl alcohol. Gently wipe the nozzles, removing any dried ink or debris. Take care not to touch the contacts on the cartridges as this can interfere with their performance.
Cleaning the contacts is the next step. Use a clean, lint-free cloth or cotton swab moistened with isopropyl alcohol to clean the contacts on both the cartridge and the printer. This helps remove any dirt or grime that may be affecting the connection.
6. Cleaning the Printhead Assembly
The printhead assembly, which holds the ink cartridges, can also become clogged and affect print quality. Start by removing the printhead assembly according to your printer’s user manual. Once removed, inspect the printhead nozzles for any blockages or dried ink.
To clean the printhead nozzles, dampen a lint-free cloth or a cotton swab with distilled water or isopropyl alcohol. Gently wipe the nozzles, removing any dried ink or debris. Take care not to apply excessive pressure to prevent any damage.
Similar to cleaning the cartridge contacts, use a clean, lint-free cloth or cotton swab moistened with isopropyl alcohol to clean the contacts on the printhead assembly and the printer.
7. Cleaning the Waste Ink Absorber
Inkjet printers have a waste ink absorber that collects excess ink during the printing process. Over time, the absorber can become saturated and may need to be cleaned. Locate the waste ink absorber inside your printer, usually located near the printhead assembly.
To clean the waste ink absorber sponge, wear gloves to protect your hands. Gently remove the sponge and rinse it with lukewarm water until the water runs clear. Squeeze out any excess water and allow the sponge to air dry completely before placing it back into the printer.
8. Cleaning the Print Spooler
The print spooler on your computer manages the print jobs sent to your printer. However, an overloaded or corrupt print spooler can cause printing issues. To access the print spooler, navigate to the “Services” section in your computer’s settings.
Delete any queued print jobs that may be lingering in the print spooler. This can help resolve any printing issues caused by a backlog of print jobs. Additionally, consider resetting the print spooler service for a fresh start.

9. Cleaning the Printer Internals
To ensure optimal performance, it’s important to clean the internal components of your printer. Start by opening the printer casing according to your printer’s user manual. This allows access to the internal components, including the paper path, ink cartridges, and printhead assembly.
Using a canister of compressed air, carefully blow out any accumulated dust or debris from the internal components of the printer. Pay close attention to the paper path, ink cartridge slots, and the area around the printhead assembly. This helps maintain the printer’s functionality and extends its lifespan.
10. Regular Maintenance Tips
Cleaning your inkjet printer regularly is crucial in preventing issues and maintaining print quality. Set a schedule for routine cleaning to ensure optimal performance. Additionally, using high-quality ink cartridges can also improve print quality and minimize clogging issues.
Avoid mishandling paper to reduce the risk of paper jams and feeding issues. Make sure to store paper in a cool, dry place and handle it with clean hands to prevent oils and dirt from transferring onto the paper.
By following these comprehensive cleaning steps and implementing regular maintenance practices, you can keep your inkjet printer in top condition and enjoy high-quality prints for years to come. Remember to refer to your printer’s user manual for specific instructions and always exercise caution while cleaning to avoid any damage. Happy printing!


