Disclaimer: This post may contain affiliate links. As an Amazon Associate, we earn from qualifying purchases.
In need of some expert advice on how to clean your printer? Look no further than “The Ultimate Guide: How to Clean Your Printer.” This comprehensive guide is packed with easy-to-follow steps and helpful tips to ensure that your printer remains in tip-top shape. From removing dust and debris to unclogging ink nozzles, this guide covers all aspects of printer maintenance. With the help of “The Ultimate Guide: How to Clean Your Printer,” you’ll be able to keep your printer functioning smoothly and producing high-quality prints for years to come.
1. Understanding the Importance of Cleaning Your Printer
1.1. Why Cleaning Your Printer is Necessary
Keeping your printer clean is crucial for ensuring optimal performance and longevity. Over time, dust, debris, and ink residue can accumulate inside and outside your printer, which can lead to various issues such as clogged nozzles, paper jams, and poor print quality. By regularly cleaning your printer, you can prevent these problems, extend its lifespan, and maintain the overall efficiency of your printing.
1.2. Benefits of Regular Printer Maintenance
Regular printer maintenance offers numerous benefits. Firstly, it helps improve print quality by ensuring clear and crisp output. Secondly, it prevents costly repairs and downtime caused by clogged or damaged components. Additionally, cleaning your printer can reduce the risk of paper jams and misfeeds, saving you time and frustration. Lastly, maintaining a clean printer can contribute to a healthier work environment by reducing the buildup of harmful allergens and dust particles.
2. Preparing for Printer Cleaning
2.1. Gathering the Necessary Materials
Before you start cleaning your printer, it’s essential to gather the necessary materials. You will typically require lint-free cloths, compressed air canisters, distilled water, isopropyl alcohol, cotton swabs, and a small brush. Make sure to check your printer’s user manual or manufacturer’s website for specific cleaning instructions and recommended products to use for your particular printer model.
2.2. Ensuring Safety Precautions
When cleaning your printer, it’s important to consider safety precautions. Ensure that the printer is turned off and unplugged before starting the cleaning process. Avoid using excessive force or sharp objects that could damage the printer’s components. Take care not to touch any internal electrical connections or the print head with your bare hands. Adhering to these safety measures will help protect both you and your printer during the cleaning process.
3. Cleaning the Exterior of Your Printer
3.1. Dusting and Wiping Down the Printer
Start cleaning your printer by addressing the exterior. Use a lint-free cloth or a microfiber cloth to gently wipe away dust and smudges from the printer’s surfaces. Pay attention to areas such as the top cover, control panel, and any accessible buttons or knobs. Avoid using harsh cleaners or abrasive materials that could damage the printer’s finish. Regular dusting and wiping will keep your printer looking neat and prevent dust from entering the internal components.
3.2. Cleaning the Printer Display and Control Panel
If your printer has a display or control panel, it is important to keep it clean for easy navigation. Use a gentle cloth slightly moistened with distilled water to wipe the display and control panel. Avoid using excessive moisture or cleaning solutions directly on the surface. Be careful not to press too hard to avoid any damage to the display or control panel. Cleaning these areas regularly will ensure smooth operation and prevent any buildup that may affect functionality.
4. Cleaning the Paper Tray and Feed Rollers
4.1. Removing and Cleaning the Paper Tray
To ensure smooth paper feeding, it’s important to clean the paper tray. Start by removing the tray from the printer. Gently wipe away any dust or debris using a lint-free cloth. If the tray is particularly dirty, you can use a mild detergent or isopropyl alcohol solution on a cloth to remove stubborn stains. Make sure to dry the tray thoroughly before reinstalling it into the printer. Regularly cleaning the paper tray will help prevent feed issues and ensure consistent print quality.
4.2. Cleaning the Feed Rollers
After cleaning the paper tray, it’s essential to clean the feed rollers. These rubber components assist in pulling the paper through the printer. Over time, they can accumulate dust and ink residue, leading to paper jams and misfeeds. Use a cotton swab slightly moistened with distilled water or isopropyl alcohol to gently clean the feed rollers. Rotate the rollers to clean the entire surface thoroughly. Avoid applying excessive pressure or using harsh solvents that could damage the rollers. Regular cleaning of the feed rollers will help maintain proper paper feeding and prevent frustrating paper jams.
5. Deep Cleaning the Print Head
5.1. Accessing the Print Head
The print head is a critical component of a printer that requires periodic cleaning. To access the print head, refer to your printer’s user manual or instructions specific to your model. Some printers have a print head that can be easily accessed by lifting a lid or removing a cover. While others may require advanced procedures or the use of cleaning cartridges. Follow the manufacturer’s recommended steps to ensure safe and proper access to the print head.
5.2. Cleaning the Print Head Nozzles
The print head nozzles can become clogged with dried ink, resulting in poor print quality. To clean the nozzles, use a lint-free cloth or cotton swab dampened with distilled water or an isopropyl alcohol solution. Gently wipe the nozzles to remove any debris or ink buildup. Avoid touching the metal components inside the print head to prevent damage. If the clogs persist, consider using a print head cleaning utility provided by the manufacturer, as discussed in the next section.
5.3. Running the Print Head Cleaning Utility
Many printers have a built-in utility or software that allows you to run a print head cleaning cycle. This process helps to flush out any clogs in the print head nozzles. To run the print head cleaning utility, access your printer’s settings through the control panel or your computer’s printer management software. Follow the on-screen instructions provided by the manufacturer to initiate the cleaning cycle. Running this utility periodically can help maintain optimal print quality and prevent clogging issues.
5.4. Performing Manual Print Head Cleaning
In some cases, manual cleaning may be required if the print head cleaning utility doesn’t resolve the clogs. To perform manual print head cleaning, you may need to remove the print head according to the manufacturer’s instructions. Once removed, gently soak the print head in a solution of distilled water and isopropyl alcohol for a few minutes. Afterward, use a soft brush or cloth to carefully remove any remaining ink or debris. Rinse the print head with distilled water, ensuring it is completely dry before reinstalling it into the printer.
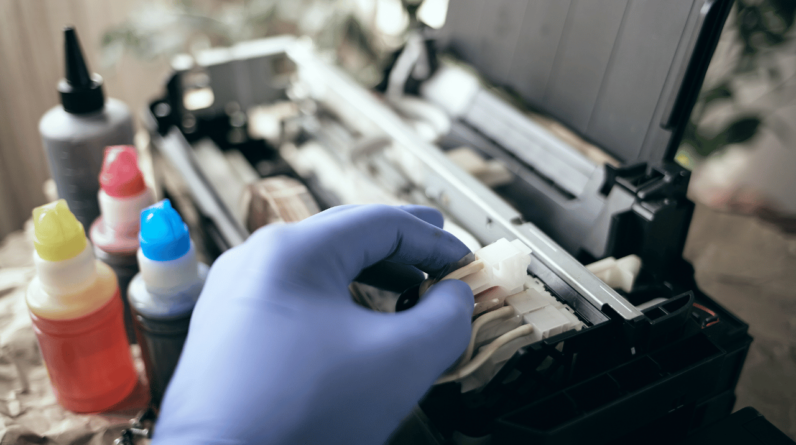
6. Cleaning the Ink Cartridge Area
6.1. Removing and Inspecting the Ink Cartridges
Cleaning the ink cartridge area is essential for preventing ink leaks and maintaining ink flow. Start by turning off and unplugging the printer. Open the printer cover to access the ink cartridges. Before removing the cartridges, take note of their positions and colors to ensure correct reinstallation. Carefully remove the cartridges and inspect them for any ink leaks or clogs. If necessary, clean any excess ink or debris using a lint-free cloth or a cotton swab moistened with distilled water.
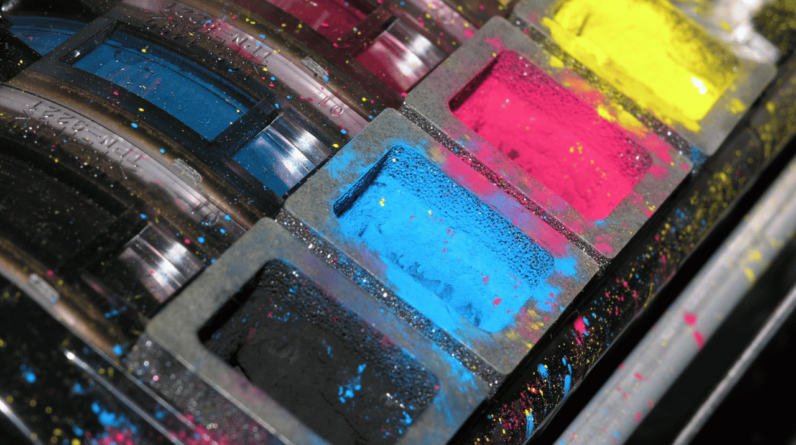
6.2. Cleaning the Ink Cartridge Contacts
The ink cartridge contacts establish communication between the cartridge and printer. Over time, these contacts can accumulate dust or ink residue, affecting the printer’s ability to detect the cartridges. To clean the contacts, use a lint-free cloth or cotton swab slightly moistened with distilled water. Gently wipe the contacts in a downward motion, avoiding any contact with the nozzles. Allow the contacts to dry completely before reinstalling the cartridges.
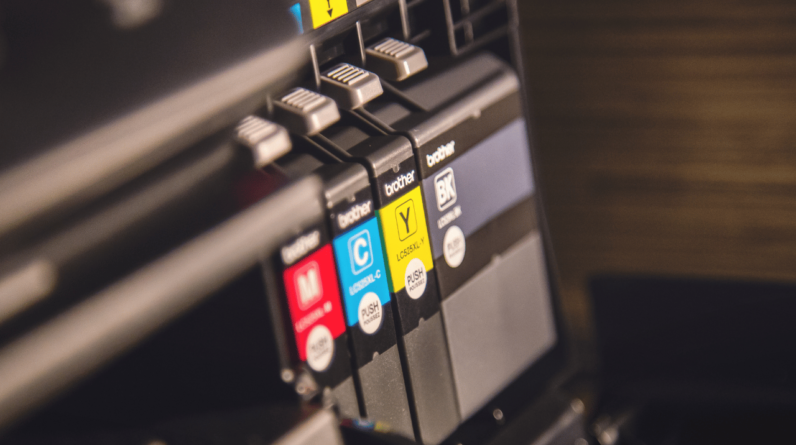
6.3. Reinstalling the Ink Cartridges
Once the ink cartridges and contacts are thoroughly cleaned and dry, carefully reinstall them into their respective slots according to the color-coded labels or instructions provided by the manufacturer. Ensure that the cartridges are securely inserted and properly seated. Close the printer cover and power on the printer. This process will help maintain clear print results and prevent potential ink-related issues.
7. Cleaning the Printer Rollers
7.1. Identifying and Accessing the Printer Rollers
Printer rollers assist in feeding the paper through the printer. Dirty or worn-out rollers can cause paper jams or uneven printing. To locate and access the rollers, consult your printer’s user manual or manufacturer’s website for specific instructions. Depending on your printer model, you may need to remove paper trays or access panels to reach the rollers for cleaning. Follow the recommended guidelines provided by the manufacturer to ensure safe and proper access.
7.2. Cleaning the Printer Rollers
Once you have accessed the printer rollers, clean them using a lint-free cloth slightly moistened with distilled water or isopropyl alcohol. Gently wipe the rollers to remove any dust, ink, or debris. Rotating the rollers as you clean will ensure that the entire surface is cleaned thoroughly. Avoid using excessive moisture or cleaning solutions that could potentially damage the rollers. Once cleaned, allow the rollers to dry completely before reassembling the printer.
8. Cleaning the Print Platen
8.1. Locating and Accessing the Print Platen
The print platen is the area where the printer’s cartridge carriage moves back and forth during the printing process. Dust and ink residue can accumulate on the platen, resulting in poor print quality. To locate and access the print platen, consult your printer’s user manual for specific instructions or guidelines provided by the manufacturer. In some cases, you may need to remove the print head or other components to access the platen.
8.2. Cleaning the Print Platen
Once you have accessed the print platen, use a lint-free cloth slightly moistened with distilled water or isopropyl alcohol to gently clean the surface. Wipe in a back-and-forth motion to remove any ink or debris. Avoid using excessive moisture or applying pressure that could damage the platen. After cleaning, allow the platen to dry completely before reassembling the printer. Regular cleaning of the print platen will contribute to clearer and more precise print outputs.

9. Cleaning the Printer’s Interior
9.1. Opening the Printer Casing
Cleaning the printer’s interior may require opening the casing or accessing specific components. Before proceeding, ensure that the printer is turned off and unplugged. Consult your printer’s user manual or manufacturer’s website for detailed instructions on opening the casing or accessing interior components. Typically, you will need to remove screws, panels, or clips to gain access. Take note of the locations and order of any components you remove for safe reassembly.
9.2. Cleaning the Interior Components
Once you have successfully opened the printer casing, use a small brush, compressed air canister, or lint-free cloth to remove dust, debris, and ink residue from the interior components. Be gentle when cleaning delicate parts such as cables or circuit boards to avoid damage. Pay close attention to areas around the print head, paper feed mechanisms, and any accessible gears or rollers. Thoroughly clean any visible dirt or buildup to ensure optimal printer performance.
9.3. Removing Paper Jams and Debris
While cleaning the printer’s interior, it’s crucial to check for and remove any paper jams or debris. Gently remove any stuck paper, being careful not to tear it or leave any small pieces behind. Inspect the paper path and rollers, removing any trapped debris that could obstruct paper feeding or cause additional jams. Clearing any obstructions will help restore smooth operation and prevent potential damage to your printer.

10. Maintaining Your Printer Moving Forward
10.1. Establishing a Regular Cleaning Schedule
Now that you have thoroughly cleaned your printer, it’s important to establish a regular cleaning schedule to maintain its performance. Depending on your printer usage and environment, aim to clean the exterior and perform basic maintenance tasks every few weeks. Consider setting reminders or scheduling cleaning sessions to ensure consistency. Following a routine cleaning schedule will help prevent the buildup of dust, debris, and ink residue, keeping your printer in top shape.
10.2. Properly Storing Your Printer
If you plan to store your printer for an extended period, proper preparation is essential. Clean the printer thoroughly, following the previous cleaning steps, ensuring that no traces of ink or debris remain. Remove and properly store the ink cartridges according to the manufacturer’s instructions. It’s also advisable to cover your printer with a dust cover or plastic bag to protect it from dust accumulation. Store the printer in a cool, dry place to prevent any potential damage caused by extreme temperature or humidity.
10.3. Seeking Professional Printer Cleaning Services
Sometimes, despite regular maintenance and cleaning, your printer may require professional attention. If you encounter persistent issues or are unsure about certain cleaning procedures, it may be best to seek professional cleaning services. Professional technicians have the expertise and specialized tools to deep clean your printer and address any underlying problems. Contact your printer manufacturer or authorized service centers for recommendations on reputable cleaning services.
By following the comprehensive guide outlined above, you can ensure that your printer remains clean and in optimal condition for years to come. Remember, regular cleaning and maintenance are crucial not only for improving print quality but also for preventing costly repairs and maximizing the lifespan of your printer. Embrace the cleaning process as an opportunity to prolong your printer’s performance and enjoy hassle-free printing experiences.