Disclaimer: This post may contain affiliate links. As an Amazon Associate, we earn from qualifying purchases.
Maintaining your HP printer is crucial to ensuring its longevity and optimal performance. In this article, you will discover the step-by-step process of performing HP printer maintenance, allowing you to keep your device in pristine condition and continue producing high-quality prints with ease. From cleaning the printhead to updating firmware, this comprehensive guide will equip you with the knowledge and techniques needed to keep your HP printer running smoothly.
Printer Cleaning
Cleaning the exterior
To keep your printer looking clean and functioning at its best, it’s important to regularly clean the exterior. Start by turning off the printer and unplugging it from the power source. Use a soft, lint-free cloth lightly dampened with water to gently wipe down the outside of the printer. Be careful not to get any water or cleaning solution inside the printer. Pay special attention to areas that tend to collect dust, such as the vents and paper tray. Once you’ve wiped down the exterior, let it dry completely before plugging the printer back in and turning it on.
Cleaning the paper path
Over time, dust and debris can accumulate in the paper path of your printer, causing paper jams and affecting print quality. To clean the paper path, start by removing any paper from the input and output trays. Next, use a clean, dry cloth or a can of compressed air to carefully remove any dust or debris from the paper path. Be sure to clean the feed rollers and separation pads, as these components can become dirty and affect paper feeding. If you notice any stubborn debris that is difficult to remove, consult your printer’s manual for specific cleaning instructions.
Cleaning the print heads
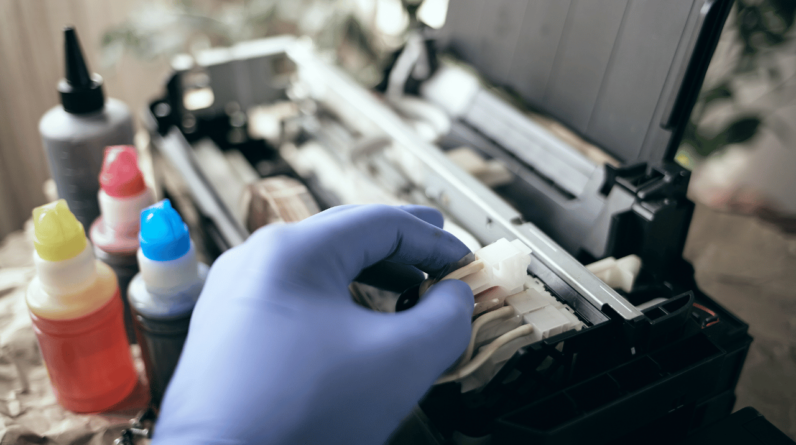
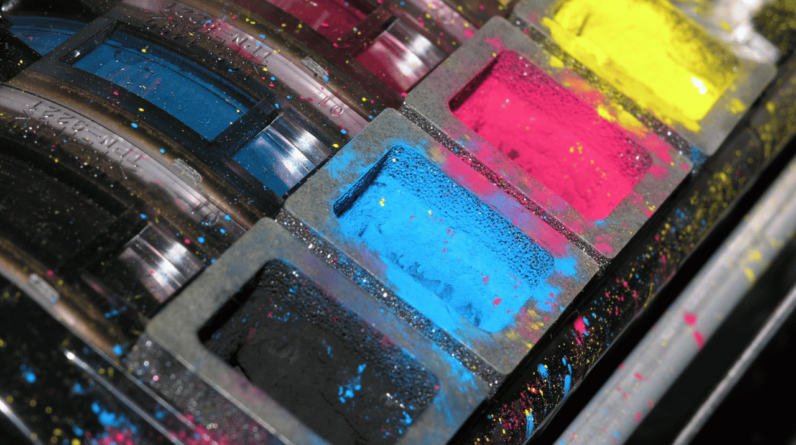
Print heads are an essential part of your printer and can become clogged or dirty over time, leading to streaks, smudges, or poor print quality. To clean the print heads, access the printer’s maintenance or settings menu and look for a “clean print heads” or similar option. Follow the on-screen instructions to initiate the cleaning process. It’s important to note that print head cleaning uses ink, so make sure you have enough ink in your cartridges before starting this process. Additionally, some printers have removable print heads that can be soaked in warm water to remove stubborn clogs. Refer to your printer’s manual for guidance on how to remove and clean the print heads properly.
Replacing Ink Cartridges
Checking ink levels
Before replacing your ink cartridges, it’s always a good idea to check the ink levels to ensure you are not replacing cartridges prematurely. Most printers have an ink level monitoring system that can be accessed through the printer’s software or control panel. Check your printer’s manual for instructions on how to check ink levels for your specific model. If the ink levels are low or empty, it’s time to replace the cartridges.
Removing old cartridges
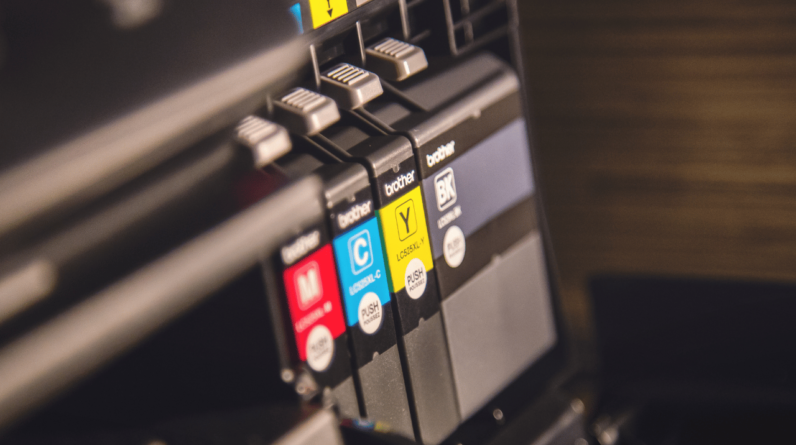
To remove old ink cartridges, start by turning off the printer and unplugging it from the power source. Open the printer cover or access panel, which will give you access to the cartridges. Depending on your printer model, you may need to lift a latch or press a release button to free the cartridges. Carefully remove each cartridge by pulling it straight out from its slot. Dispose of the old cartridges properly according to your local recycling guidelines.
Installing new cartridges
Before installing new ink cartridges, it’s important to make sure you have the correct cartridges for your printer model. Refer to your printer’s manual or manufacturer’s website for the correct cartridge part numbers. Once you have the new cartridges, remove them from their packaging and gently shake each cartridge to evenly distribute the ink. Open the printer cover or access panel and insert each cartridge into its corresponding slot. Press down firmly until the cartridge clicks into place. Close the printer cover or access panel and plug the printer back in. Turn on the printer and follow any on-screen instructions to align the new cartridges.

This image is property of images.unsplash.com.
Updating Printer Firmware
Checking current firmware version
Firmware is the software that runs on your printer and controls its functionality. Just like any other software, firmware updates are periodically released by printer manufacturers to improve performance, fix bugs, and add new features. To check the current firmware version of your printer, access the printer’s settings or maintenance menu. Look for a “firmware” or “system information” option, where you should find the firmware version listed. Note down the version number for reference.
Downloading the latest firmware
To download the latest firmware for your printer, visit the manufacturer’s support website and search for your printer model. Look for a “drivers and software” or similar section, where you can find the firmware downloads. Enter your printer model and operating system details, then select the firmware download that matches your current version. Follow the instructions provided on the website to download the firmware file to your computer.
Updating the firmware
Once you have downloaded the firmware file, it’s time to update your printer. Start by connecting your printer to your computer using a USB cable or by connecting it to your local network. Make sure the printer is turned on and that there is a stable internet connection. Locate the downloaded firmware file on your computer and double-click to run the installer. Follow the on-screen instructions to initiate the firmware update process. It’s important not to turn off or disconnect the printer during the update, as this can cause damage to the firmware. After the update is complete, restart your printer and verify that the firmware version has been successfully updated.
Calibrating Print Quality
Printing a calibration page
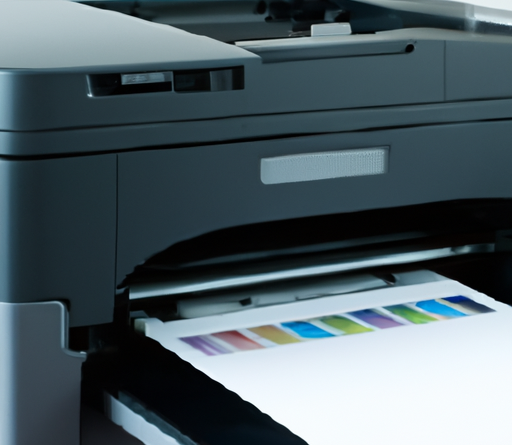
Calibrating print quality is an important step to ensure accurate and vibrant colors, sharp text, and overall high-quality prints. Many printers have a built-in calibration feature that can be accessed through the printer’s settings or maintenance menu. Look for a “calibrate printer” or “print quality calibration” option. Follow the on-screen instructions to print a calibration page.
Adjusting print quality settings
After printing the calibration page, examine it for any visible issues such as streaks, color variations, or misaligned text. If you notice any problems, access the print settings on your computer and make adjustments accordingly. For example, you may need to adjust the print quality to a higher setting, change color profiles, or enable specific settings for different types of paper. Consult your printer’s manual or manufacturer’s website for guidance on how to access and adjust print settings for your specific printer model.
Performing color calibration
Color calibration is especially important for those working with graphics, photography, or any other color-critical tasks. To perform color calibration, many printers offer software or tools that can be downloaded and installed on your computer. These tools guide you through the process of adjusting color settings to ensure accurate color reproduction. Follow the instructions provided with the calibration software to complete the process. It’s worth noting that color calibration should be performed regularly to maintain consistent and accurate color output.

This image is property of images.unsplash.com.
Clearing Paper Jams
Identifying the jammed paper
Paper jams can be frustrating, but with a little patience, they can be resolved. The first step in clearing a paper jam is to identify where the paper is jammed. Start by opening the printer cover or access panel, and carefully inspect the areas where the paper path is visible. Look for any crumpled or misaligned paper, as well as any torn pieces of paper. It’s important to note that you should never exert excessive force or use sharp objects to remove jammed paper, as this can damage the printer.
Removing the jammed paper
Once you have identified the jammed paper, gently pull it out in the direction of the paper path. Avoid jerking or pulling the paper forcefully, as this can cause the paper to tear and make the jam more difficult to resolve. If the paper is stuck and cannot be easily removed, consult your printer’s manual for specific instructions on how to clear the paper jam. In some cases, removing the paper tray or accessing the rear of the printer may be necessary to clear the jam completely.
Preventing future paper jams
To minimize the occurrence of paper jams in the future, it’s important to follow a few preventative measures. First, make sure you are using the correct type and size of paper for your printer. Using paper that is too thick or too thin, or loading the paper incorrectly, can increase the likelihood of jams. Additionally, keep the paper trays clean and free from dust or debris that can interfere with paper feeding. Regularly check for any foreign objects such as paper clips or staples that may have accidentally fallen into the paper path. By taking these simple preventative steps, you can reduce the risk of paper jams and maintain smooth printing operations.
Resetting the Printer
Performing a power cycle
Sometimes, resetting your printer can resolve minor technical issues and restore normal functionality. The first method of resetting your printer is by performing a power cycle. Start by turning off your printer and unplugging it from the power source. Wait for at least 30 seconds to ensure that all residual power is drained from the printer. After the waiting period, plug the printer back in and turn it on. Allow the printer to go through its startup sequence and try using it again. Power cycling can often resolve connectivity issues, error messages, and other minor problems.
Performing a factory reset
If a simple power cycle doesn’t fix your printer issues, you may need to perform a factory reset. A factory reset will restore your printer to its original settings, clearing any customized settings or configurations. To perform a factory reset, consult your printer’s manual for instructions specific to your model. Typically, the process involves accessing the printer’s settings or maintenance menu and selecting the option to reset to factory defaults. Once the reset is initiated, follow the on-screen instructions and wait for the printer to complete the reset process. After the reset is complete, you will need to set up your printer again with your preferred settings.
Resetting network settings
If you are experiencing connectivity issues with your printer, resetting the network settings can often help establish a stable connection. Start by accessing the printer’s settings or network menu and look for an option to reset the network settings. Follow the on-screen instructions to initiate the reset process. After the reset is complete, you will need to reconnect your printer to your network. Consult your printer’s manual or manufacturer’s website for specific instructions on how to connect your printer to a wireless network or configure network settings.
Cleaning the Scanner Glass
Identifying smudges or dirt on the glass
If you are experiencing streaks or spots in scanned images or copies, it’s possible that the scanner glass is dirty. To determine if the glass needs cleaning, inspect it carefully under good lighting conditions. Look for any smudges, fingerprints, or dirt particles on the glass surface. Even a small speck of dirt can affect the quality of scanned or copied documents, so it’s important to keep the scanner glass clean and free from debris.
Cleaning the scanner glass with lint-free cloth
To clean the scanner glass, start by turning off the scanner and unplugging it from the power source. Remove any documents or objects from the scanner bed. Use a soft, lint-free cloth lightly dampened with water or a mild glass cleaner to gently wipe the scanner glass in a straight motion. Avoid using excessive moisture or harsh cleaning solutions, as these can damage the glass surface or internal components of the scanner. After cleaning, let the glass dry completely before using the scanner again.
Avoiding abrasive cleaners
It’s important to avoid using abrasive cleaners, solvents, or rough materials such as paper towels or tissues, as these can scratch the scanner glass. Scratches on the glass can interfere with the scanning process and result in poor image quality. Stick to using a soft, lint-free cloth and mild cleaning solutions specifically formulated for glass surfaces. If you are unsure about the suitability of a particular cleaning solution or technique, consult your scanner’s manual or contact the manufacturer for guidance.
Adjusting Paper Settings
Checking paper type and size settings
To ensure optimal print quality and prevent paper jams, it’s important to check and adjust the paper type and size settings on your printer. Start by accessing the printer’s settings or print preferences on your computer. Look for an option to adjust paper settings or paper type. Select the appropriate paper type that matches the paper you are using, such as plain paper, photo paper, or envelopes. Additionally, verify that the paper size settings are correct. Incorrect paper size settings can lead to misalignment and paper jams.
Adjusting tray alignment
Tray alignment is another important factor in preventing paper jams and ensuring accurate paper feeding. Improper tray alignment can cause paper to skew or misfeed, resulting in crooked or misaligned prints. To adjust tray alignment, start by removing all the paper from the input tray. Next, locate the paper width guides or paper width adjustment levers on the tray and adjust them according to the size of the paper you are using. The guides should hold the paper snugly without squeezing or bending it. Once the guides are properly adjusted, reload the paper into the tray and verify that it is aligned correctly.
Adjusting paper thickness settings
Different types of paper have different thicknesses, and adjusting the paper thickness setting on your printer can ensure proper paper feeding and prevent jams. Access the printer’s settings or print preferences on your computer and look for an option to adjust paper thickness or paper weight. Select the appropriate setting that matches the thickness of the paper you are using. It’s worth noting that certain printers have automatic paper thickness detection, eliminating the need for manual adjustments. Refer to your printer’s manual or manufacturer’s website for specific guidance on adjusting paper thickness settings for your printer model.

Troubleshooting Print Quality Issues
Identifying common print quality problems
Print quality issues can range from streaks and smudges to faded or blurry prints. To troubleshoot these issues effectively, it’s important to identify the specific problem you are experiencing. Common print quality problems include uneven or missing colors, banding (horizontal or vertical lines), text or images appearing faded or blurry, and ink smears or smudges. By understanding the nature of the problem, you can apply the appropriate solution to address it.
Cleaning the print heads
If you notice uneven or missing colors, streaks, or banding in your prints, it’s likely that your print heads are clogged or dirty. Cleaning the print heads can help restore consistent print quality. Refer to the section on “Cleaning the print heads” earlier in this article for detailed instructions on how to clean the print heads.
Aligning the print heads
Misaligned print heads can cause blurry or misaligned prints. To align the print heads, access the printer’s settings or maintenance menu and look for an option to align or calibrate the print heads. Follow the on-screen instructions to initiate the alignment process. Some printers have automatic alignment features, while others require manual adjustments using a test page or alignment pattern. Consult your printer’s manual or manufacturer’s website for specific instructions on how to align the print heads for your particular printer model.
Preventative Maintenance
Regularly cleaning the printer
Regular cleaning is essential for maintaining optimal print quality and preventing potential issues. Aside from the specific cleaning steps mentioned earlier in this article, it’s important to periodically clean other printer components such as the platen (roller), encoder strip, and paper feed rollers. Refer to your printer’s manual for detailed instructions on how to clean these components safely. Additionally, keep the printer dust-free by using a soft cloth or duster to wipe down the exterior and surrounding area regularly.
Keeping it in a dust-free environment
Dust is one of the leading causes of printer issues, including paper jams, print quality problems, and even hardware damage. To minimize the accumulation of dust and debris in your printer, it’s important to keep it in a clean and dust-free environment. Avoid placing the printer near dusty areas, such as open windows or high-traffic areas. Consider using printer covers or dust covers when the printer is not in use to provide an extra layer of protection.
Updating software and drivers
Regularly updating your printer’s software and drivers can help ensure compatibility with the latest operating systems, enhance performance, and fix known issues. Check the manufacturer’s website periodically for any available software or driver updates for your printer model. Download and install the updates according to the provided instructions. It’s worth noting that some printers have automatic update features that can be enabled in the printer’s settings or software. If available, enable this feature for effortless software and driver updates.
By following these comprehensive maintenance tips, you can keep your printer running smoothly, maintain excellent print quality, and prolong the lifespan of your printer. Regular cleaning, replacing ink cartridges when necessary, updating firmware, calibrating print quality, and troubleshooting print issues will ensure that you get the most out of your printer and enjoy hassle-free printing for years to come. Remember to consult your printer’s manual or manufacturer’s website for specific instructions and recommendations tailored to your printer model. Happy printing!